Posts

Showing posts from February, 2019

Making Wood Planks in Blender for 3D Printing

Image
I've been wanting to make some 3D Printable terrain that involves wooden boards, but I was really struggling with how to get a good wood-grain texture without sculpting it by hand.  After a lot of trial and error, I've invented a process that I'm really happy with!  Well, I've probably re-invented it, as I'm sure plenty of people have done this before... but since I wasn't able to find any of their tutorials, I figure that I'll just take the credit and write my own! When making wooden boards or planks to be 3D printed, you've got to strike a careful balance.  Too little wood-grain ends up just looking like stripes, but too much ends up as an unprintable mess.  I think that the sweet spot for board width is anywhere between 5 mm and 8 mm, with grain lines that are about 0.4 mm wide and 0.3 mm deep.  From what I've seen, those measurements have resulted in nice distinct lines that have printed really well (although I'm sure that they can be tweak...
Blender Tip: Moving along the Local vs. Global Axes

Image
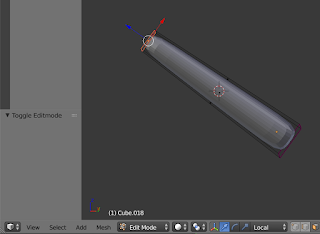
When I'm roughing out the shape for a new model, I like to make separate meshes for each of the major body parts (so there's a forearm mesh that is separate from the upper-arm mesh which is separate from the chest which is separate from the abdomen...).  That makes it really easy for me to move them around and get the pose that I want; it also makes it easy for me to sculpt on details, as I can focus on just getting one part to look good at a time. When I'm making body parts this way, each individual part is almost always an elongated cube with the Subdivision Surface  modifier applied to it.  I like to stretch them out along the Z axis, then rotate the thing in Object  mode.  That preserves the "z stretch" which makes it nice and easy for me to select an end face of my "cube" and drag it out further or move it in a bit.  I've almost always done this by the handles that show up when you select a face, but I literally just learned that there's a...

New Thing: Kobold

Image
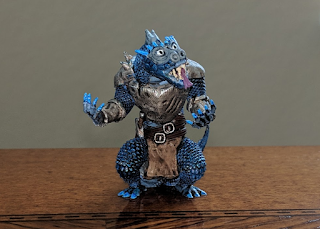
I was really happy with how my drakes turned out, but as I looked at the Rending Drake, I couldn't help but think that it really needed some armor to complete its look.  So, I decided to turn it into a kobold ! I figured that it would be fun for this guy to be sporting a bunch of scavenged equipment, so I designed some basic shapes and then went to town on them in sculpt mode to add cracks and scratches and other bits of wear and tear.  That was mostly just sculpting trial-and-error though, so isn't really worth writing about.  His belts, on the other hand, were actually pretty interesting! When I was initially blocking out the shapes for this guy, I gave him a belt using the same technique that I've done before: just make a cube and apply a Subdivision Surface  modifier to it to round it out, then put that cube around his midsection, adjust the faces so that it's the right size, and call it good.  While that method works, it has a few drawbacks: it's ...