Posts

Making Bear Teeth!

Image
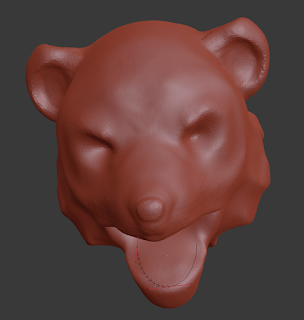
Those of you who follow my Patreon page know that I've been working on a Cave Bear model recently.  It's still a work-in-progress, but I'm really happy with the method that I used to make the teeth and so I wanted to write about it! In the past, I've made teeth the same way that I added spikes to the Living Bones model's pauldron .  I made a single tooth, then turned on Snap during transform  and moved it into place on the jaw, then I duplicated it and did it again.  It worked, but it took a lot of work to get everything in place and aligned well.  Not any more! This time, I decided to try something different.  Instead of manually copying and then placing all of the teeth, I decided that I'd be efficient (aka, lazy).  I decided that I'd use an array! When I made the Giant Viper model , I used a nested array of scales to make it really easy to model and pose.  Compared to that, an array of teeth is simple... why haven't I ever do that befor...
Getting Started with 3D Printed Minis, Part 7: Finishing and Painting a 3D Print

So, now that you've got your mini printed, how do you finish it?  The first step is to clean up the model, as 3D printing can leave little artifacts that you probably don't want on your finished piece.  The first step is to remove any supports from the print.  Next, I remove any strings or other bits of loose plastic.  As I wrote about before, I love to use my soldering iron for this step, as it zaps thinner strings pretty much instantly and allows me to really control the application of heat to the model so that it doesn't warp or deform.  After those two steps are completed, it's time to start thinking about how the model's going to need to look over all. My first decision point is, do I want to apply a polyurethane coat under my paint?  The answer to that question depends on how smooth I want this model to be.  If it's something like a slime or an ooze, I need it to be  very  smooth, but that's not necessarily right for a normal advent...

New Thing: Earthen Grasp Model

Image
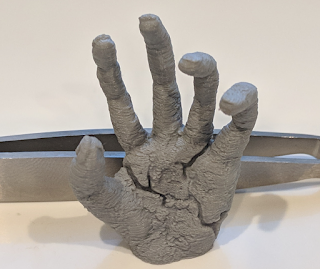
I really enjoyed watching the video that I linked last week and wanted to try the texturing technique that Zach used to make the smaller scales on the dragon.  I then saw a post on Reddit asking about a good model for the D&D spell, Earthen Grasp.  I haven't had the chance to play D&D for many years and wasn't familiar with the spell, but it seemed like a giant stone hand would be an excellent opportunity for me to try out that texturing technique, so I decided to give it a go! First, I had to make a hand model.  In the past, I've used some quick and dirty shortcuts to make hands .  In that case, the whole hand was only going to be a few mm tall, so it really didn't need a ton of detail.  In this case, the hand was going to be about 40 mm tall, so those tricks weren't going to fly.  I decided to start with the fingers, using a refined version of the technique that I used on the Wind Demon hand .  One of the challenges that I ran into with the...

Zacharias Sculpting a Dragon!

Zacharias Reinhardt, whose YouTube videos I've found incredibly helpful ever since I started sculpting for 3D printing, recently published a video about how he made an incredible dragon model  (the one he made for Danny's Lost Dragons kickstarter)!  Anyway, if you're interested in 3D modelling, it's absolutely worth watching.  He has a timelapse of most of his sculpting process and, after he does something particularly interesting, he goes back and explains the techniques that he used.  I'm particularly excited about how he made the scales on the dragon, so I can't wait for an opportunity to use those techniques!

Cold Pulls with PLA

Image
3D Printers are amazing tools, and while they've come a long way, they're still a pretty new technology and so need attentive maintenance to keep them working (as opposed to a 2D printer, which pretty much takes care of itself these days).  One key maintenance technique is the cold pull .  In short, a cold pull is when you pull your filament back out of your extruder while it's mostly cold.  Hopefully, the cold filament has solidified around any junk in your nozzle, so when you pull it out, you also pull out anything that's been compromising your prints! I print exclusively with PLA and a .25 mm nozzle, and while I'm not sure how that context might color my experiences, I figured that I should state that upfront.  Why?  Well, some of my experiences go contrary to the conventional cold pull wisdom.  Primarily, it's that I do my cold pulls with PLA instead of switching over to nylon.  I did one round of cold pull maintenance with nylon filament... and ...

Modelling a Hand in Blender for my Inox Models

Image
Hands are tough.  From a purely artistic perspective, hands are difficult because they have a lot of different bits that both need to be proportionate and can take a lot of unique positions.  From a mechanical perspective, hands are difficult because they involve relatively small bits that require a finely tuned machine to print, or those bits stick out alone and are super fragile.  I've tried a lot of different techniques for making hands for my models, but the Inox hands are some of the ones that I'm most happy with.  They're also some of the easiest ones that I've ever made! I started with a subdivided cube that I squished into a basic disk in edit  mode.  This would become the building block for the rest of the hand.  I then pressed tab  to drop back to object  mode, then used shift-d  to duplicate it.  I rotated my duplicate 90 degrees along the vertical (z) axis by pressing r z 90  and then positioned it so that it coul...

Character Modelling Workflow for the Inox Shaman

Image
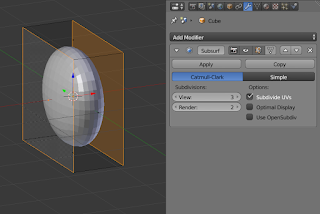
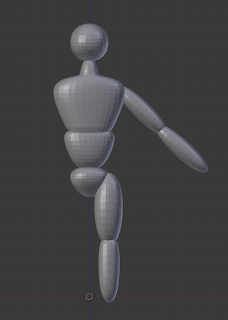
I frequently mention that I'm not an artist, so I use a workflow where I model each body part individually and then basically shove them together to make a final model.  I'm writing this as I'm starting a new model, so I made the very rough shapes for the major body parts and set them into position. Once I saw what I'd done, I had to stop and laugh.  Wow, am I ever not an artist - I think that my 7 year old draws more proportionate people than this!  Each of those parts is a manipulated cube with a subdivision surface applied to it (the chest has a bit of extra extrusions to make the shoulders/neck).  This is basically how I start all of my models, and it's really easy to fix it so that it conforms to biological standards. In Blender, you can set a background image to use as a reference.  On the n  data panel, go down to Background Image  and press Add Image .  Then, hit Open  and browse to the image that you want on your background....