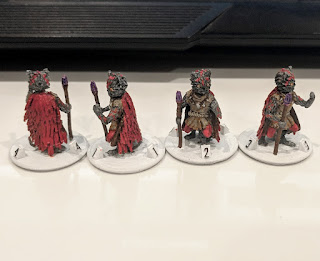
New Thing: Gloomhaven Vermling Shaman
 With the Vermling Scout built, the natural next step was obviously the Vermling Shaman! I was able to reuse a lot of the parts of the Scout, which was really nice. I decided to give the Shaman a more upright pose, so I moved his parts around and built a new torso (to be his ratty tunic, rather than the furry one that the Scout wears). After that, I built a quick staff and then went to work on the feathered cape. That's what I want to focus on, today.
I tried a bunch of different methods for creating that cape, but in the end I settled on using Blender's Particle System. That meant that I basically modelled two things: a single feather and a smooth cape. Then, I told Blender to make an absurd number of feathers and to lay them out on that cape. There we go, post finished, nice and easy! ;)
After I made a quick feather and cape, I selected my cape object and then went to the Particles tab. On there, I pressed the + button to add a new particle system, then changed its type to hair. Next, I enabled the Advanced option and went to work.
 Down in the Render section, I pressed the Object button, which opened up the Dupli Object setting. I selected my feather object and then played around with the Size and Random Size values until the feathers looked nice. I also played around with just about all of the settings in the Emission section until I liked the distribution of my feathers.
At this point, my feathers were sticking out at all angles, but that's easily fixed! It's important to get the basic stuff all worked out, because our next step is to go into Particle Edit mode and change the way the "hair" flows. Once that's done, I don't know of any way to edit a lot of these settings.
So, with a good distribution of feathers across the cloak, the next step is to save your file and then enter Particle Edit mode (or make a duplicate object, or whatever you want to do so that you can roll back to make changes). Now, you'll see the hairs again (instead of the feathers), but your toolshelf will have some useful buttons. I used the comb tool to comb all of the hairs downwards, like this.
 |
| Before |
 |
| After |
And there you have it, a feathered cape!


Comments
Post a Comment