Making Weapon Handles in Blender
Hey folks! I often find myself needing to make weapons of various description for my models. When those weapons are held in the model's hands, the grips don't usually need much detail... but if they're still sheathed, adding a quick wrap can really help them pop. And fortunately, it's super easy to make wrapped weapon grips in Blender; here's how!
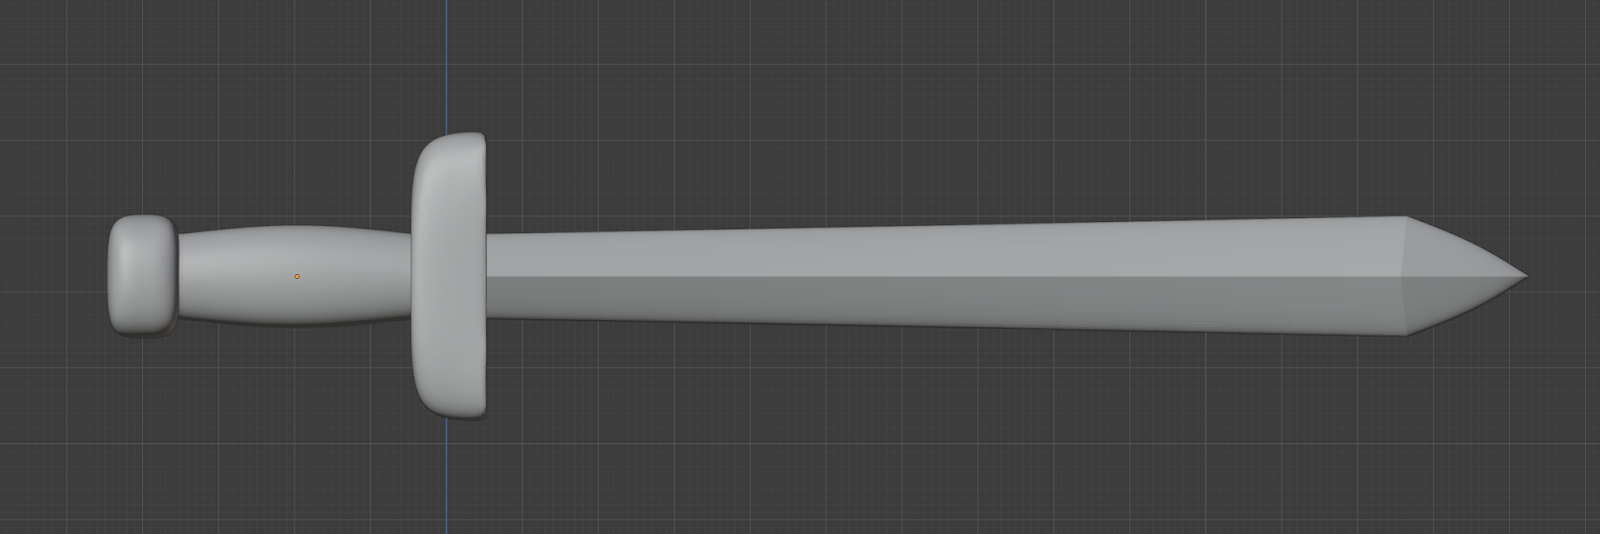
First, I made myself a basic shortsword mode. Using the Mirror modifier on two axes makes modeling symmetrical objects like swords much easier, so I totally recommend it!
After the basic sword design is done, you're going to want to make the grip a separate object to help the wrap go smoothly. To do that, hit shift-d to duplicate the object, then edit the duplicate (or the original... it doesn't really matter) and delete the guard, blade, and pommel. Then, edit the other one and delete the grip. In the end, you'll have two pieces like this (I've dragged the grip to the side, to make the point a little more clear, but you'll want to leave it in place):


With the new grip built, the next step is to make the wrap around that grip. The easiest way to do this is to hit shift-a and select mesh -> plane to add a plane, then drag it up near the grip. Tab into Edit Mode on the plane and delete vertices so that you've only got a straight line.

Next, add the Screw modifier to the plane and adjust the Axis setting until you get a nice ring shape (I used the X axis given my object's orientation). Drag the plane around so that the ring goes around your grip; you may need to go into Edit Mode and adjust the location of the edge in relationship to the object orientation to grow or shrink that circle. Don't worry about getting it tight to the grip, just make sure that it's all the way around on the outside. Adjust the Angle, Screw, and Iterations settings until you've got a good wrap. I also like to expand the Normals section and disable Smooth Shading so that I can actually see my geometry.

With the basic wrap in place, the next step is to shape it and then give it some 3-dimensionality. First, we'll want to use the Shrinkwrap modifier to lay these wraps flat against the grip (so make sure that you select the grip object as the Target of the modifier). Then, we'll give it some heft with the Solidify modifier. I like to set my solidify Offset to 0 so that it'll protrude inwards as far as it does outwards, and then give it a large enough Thickness value to make a visible wrap.

The final step is to smooth out the wrap a bit. I like to use the Subdivision Surface modifier to do that. If you do so, you'll probably end up with something that looks like cord around the grip. That's not necessarily a problem, but if you're looking for more of a "leather strip" effect, you can fool around with the Solidify modifier's Edge Data section to add a bit of Crease and keep the strip more flat.


Comments
Post a Comment