Posts

Showing posts with the label Modifiers

Making Weapon Handles in Blender
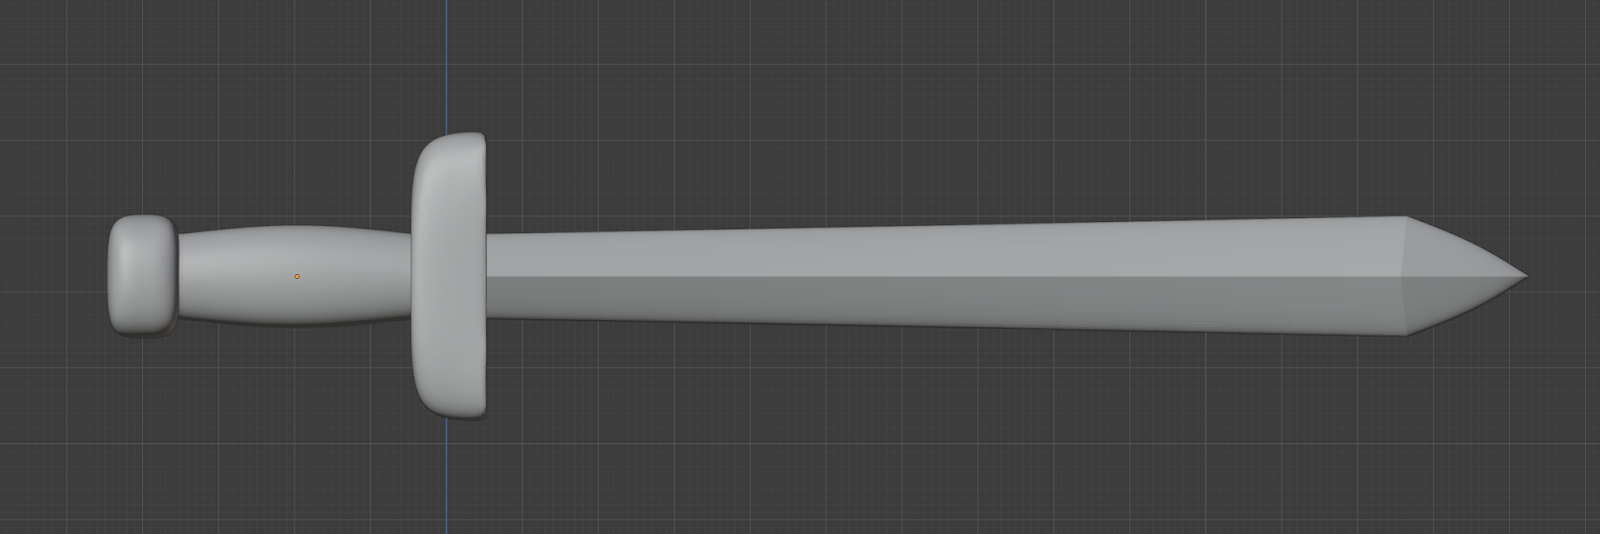
Image
 Hey folks!  I often find myself needing to make weapons of various description for my models.  When those weapons are held in the model's hands, the grips don't usually need much detail... but if they're still sheathed, adding a quick wrap can really help them pop.  And fortunately, it's super easy to make wrapped weapon grips in Blender; here's how! First, I made myself a basic shortsword mode.  Using the Mirror  modifier on two axes makes modeling symmetrical objects like swords much easier, so I totally recommend it! After the basic sword design is done, you're going to want to make the grip a separate object to help the wrap go smoothly.  To do that, hit shift-d  to duplicate the object, then edit the duplicate (or the original... it doesn't really matter) and delete the guard, blade, and pommel.  Then, edit the other one and delete the grip.  In the end, you'll have two pieces like this (I've dragged the grip to the side, to make t...

Making Veins in Blender

Image
 I've made a few monsters that have needed veiny surfaces, from plant monsters to other things .  On those models, I've pulled out the sculpting tools and have made them by hand.  While I've been generally happy with the results, that process has been both labor-intensive and inflexible (meaning that it's difficult to change things around after they've been sculpted).  I'm working on another model that needs some veiny texturing and figured out a much better way to do it... so now I'm sharing what I've done! First, I want to say that these screenshots are from the really early prototyping phase for this model, where I'm testing out techniques and trying to figure out what this thing's going to look like overall.  But, I was so happy with this vein technique, that I decided that I wanted to write about it... so here we are! I like these veins for a few reasons.  Firstly, I think that they've got a good organic aesthetic, particularly at the i...

Copying Parent-Relative Positions from one Object to Another in Blender

Image
Well, the title of this post sure is a mouthful... but try as I might, I just couldn't come up with a shorter way to phrase what I've been doing and am going to write about here!  I've been working on a proxy model for the Blood Imp monster from Gloomhaven: Jaws of the Lion.  There has been a terrible heat wave in California though with rolling brown-outs in my area due to the increased draw on the electric grid caused by everyone's AC units.  Given that we've all been suffering from power shortages, it just doesn't seem responsible to fire up the printer and put more stress on the system.  Also, because this model is only a head and 4 limbs and reposing it isn't as much work as it would be for a normal humanoid creation, I figured that I could make a few alternative poses for it while I wait out this heat wave to begin test printing! So, I made my first pose, copied it off to a new collection, then began work on another pose.  It wasn't until I'd do...

Manipulating Modifiers on Many Meshes

I like to work with many distinct meshes when I'm making a model in Blender.  Because of this workflow, I often find myself needing to add the Decimate modifier to tons of objects at once.  You can use the shift-r  shortcut to redo whatever your most recent action was, which is convenient if you're trying to put the same modifier on a few objects... but if you need to put it on 20 objects and need to set a value for each one, it gets a bit old.  Fortunately, there's a better way! All you need to do is set up your modifier stack on one of the objects, then select them all via shift-click .  Click once more on the object that's fully modified, then hit ctrl-l  and under Make Links select Modifiers .  This will copy all of those modifiers, fully configured, onto every selected object!  What do you do if you want to remove (not apply, but actually remove) modifiers from all of the objects?  Just remove the modifiers from one of them and use the ...

Building Buildings

Image
I've been working on my King of Tokyo proxy models for a while now, which has meant that I've needed a bunch of buildings to put onto the bases for the various Kaiju to rampage through.  Rather than building each of these buildings by hand, I put together a system of arrays to do it for me.  Since I'm rather proud of how it all comes together, I figure that I should go ahead and write about it here! So, let's talk about how it all works.  First, here's the meat of the "city building" collection that I use (for those of you on the Patreon, that's the actual name of the collection where I keep all of this stuff in my King of Tokyo files, if you want to look at it in Blender).  As you can see, there are several partial buildings there, as well as some random bits on the right.  It's a bit harder to see, but directly in front of the left-most building, there are three bezier curves (although each is a straight line), running parallel to the world axe...

Making Chainmail in Blender

Image
Hi everyone - this week I came across an awesome technique for making repeating patterns on a mesh in Blender.  Given that I'm currently working on an armored headless horseman model, this struck me as the perfect way to make some chainmail.  Check it out: This is cool because that chainmail is a repeating pattern of intersecting rings.  Well, it's specifically a repeating pattern of the intersections between a bunch of rings, but you get the point ;) So, how'd I turn that little chain intersection bit into a bunch of chainmail for my model?  I used the Tissue Addon , that's how!  I watched a great video by Default Cube on turning objects into woven baskets , and I thought to myself, 'this would work fantastically for chainmail!" So, first, what's the Tissue addon do?  Basically, you give it two meshes, call them a host mesh and an object mesh.  It then puts a copy of the object mesh onto every face of the host mesh.  So, in my case, I c...

More Techniques to Make Hands

Image
I've experimented with a lot of different ways to make hands, but I used a new technique on a recent model (a creepy demon ) that I'm really happy with.  I basically used my normal whole-body object posing technique , but on the hand scale, and it worked really well! So, I made my hand out of 16 different objects (and eventually added claws to the finger-tips).  Each finger was 3 elongated and subdivided cubes.  The thumb was two such cubes, and the palm was another two cubes (but shaped a bit to create a more palm-like shape).  I decided to use two separate objects for the palm because so much of the palm shape changes based on thumb movement (I guess, technically, that second half of the palm is basically the first segment of the three-part digit that makes up the thumb, but whatever). When I made those cubes though, I changed things up slightly from my normal technique.  Typically, I would resize and tweak the cubes in Edit Mode in order to change the le...

Making Tentacular Horrors!

Image
I love making tentacular horrors in Blender.  Through the use of a few relatively simple curves, you can easily make complex, tentacled monsters, which is really fun!  Using this method, a tentacle will be made up of 3 parts: A Circle that defines the cross-section of the tentacle (called the Bevel in blender) A Curve that defines the Taper of the tentacle A Curve that defines the pose of the tentacle First, I like to start with the cross-section circle.  To make this, I just press Shift-A  then go to Curve -> Circle  to make myself a nice round circle.  If we want this tentacle to be malformed in some way, we can edit that circle, but for now, let's just keep it round. Next, I make the taper curve.  You can use either a Bezier Curve or a Nurbs Path for this and I'll bounce back and forth between the two depending on how complex I want the taper to be or just how I feel like manipulating the controls for the curve.  When I'm making ...