Posts

New Thing: Scythe Popularity Token
Image
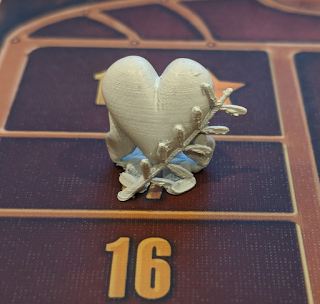
I was very happy with the way the Scythe Power Tokens looked on the board, so I decided to round out my component upgrades with improved Popularity and Victory tokens as well!  I started with the Popularity tokens , which ended up looking pretty cool, too! The first thing that I did was to make a heart.  I tried using the same Bezier curve technique that I used on the Power Tokens, but it didn't work out too well.  I made a decent enough looking heart and then was able to extrude it... but I wanted a smooth rounded heart, like you'd see in a Nintendo game, rather than a flat extrusion.  I'd been imagining that a Subdivision Surface  modifier would create that effect, and it sortof did... but it also left all sorts of crazy artifacts around the edges that looked really bad.  So, I tried again. This time, I tried a good old fashioned extruded cube with the Subvision Surface  modifier on it.  To make my life easier, I moved one side's vertices to...
Getting Started with 3D Printed Minis, Part 6: Slicing a Mini

Image
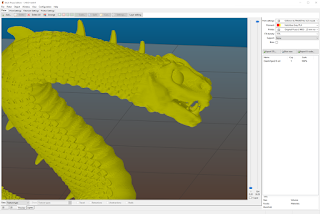
There are many different slicing programs out there, but my printer came with Slic3r Prusa Edition, so that's the one that I learned to use.  When printing a mini, the rule of thumb is "low and slow".  You want the lowest layer height and nozzle size that you can reliably manage and to print it as slowly as you can tolerate ;) In my case, I've had pretty good results with .05 mm layers and a .25 mm nozzle, printing no faster than 25 mm/sec.  That's a pretty conservative speed, so I could probably get away with faster movements for much of the print on my models... but minis tend to have a lot of really tricky parts, like overhangs, thin sections, and bridges, that benefit from slower print speeds. Why do you want lower layer heights?  Two reasons: they have less visible layer lines and they show more details on the model.  As you can see from the below Slic3r previews, the smaller layers are able to represent much more subtle details along the Z axis.  ...

Making Meshmixer Supports, Part 2

Image
I hadn't really planned on making my Meshmixer supports post into a series, but I got a few really good questions about the technical process of drawing the actual supports, rather than the theory of how to design supports.  That post is already gargantuan, so I figured that it was time for a sequel!  I'm already off the rails, so who knows, maybe this will even become a trilogy (ok, probably not)! The act of drawing supports in Meshmixer is not super intuitive.  What is is, however, is consistent.  When you're drawing supports, you're drawing a 3D object using a 2D interface.  Meshmixer does its best to help you, but it can still be a bit tough.  There are a few ways to draw additional supports, and I use them all at various times while designing supports for a model! The easiest way to draw additional supports is to just click on a red highlighted part of the model and let Meshmixer try to determine a viable path for the support tree.  Often thi...

Changing Your Perspective in Blender

Image
The more that I use Blender, the more impressed I am with how powerful it is.  One skill that is crucial to my use of Blender is my ability to change my perspective on an object as I'm working on it.  Fortunately, there are a whole bunch of shortcuts that allow me to do exactly that! Numpad 1 : "Front" view, looking directly along the Y Axis Numpad 3 : "Right" view, looking directly along the X Axis Numpad 7 : "Top" view, looking directly along the Z Axis Numpad 2,4,6,8 : Orbit your view by 15 degrees in the direction implied by the key (2 is downwards, 6 is to the right, etc.). Numpad 9 : Orbit your view 180 degrees. Numpad 5 : Toggle Orthographic view, which renders things "flat" making them easier to line up.  I do most of my modelling with this view enabled I use those shortcuts constantly, flipping between the perspectives when I want to move things around or when I want to rotate something.  When I'm setting up the rough po...

New Thing: Scythe Power Token

Image
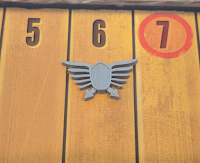
I recently picked up a Scythe expansion and, due to a packaging error, received 2 Wind Mills for one of the factions... but no Power Token!  Not exactly the end of the world, but certainly a good push to design my own Power Token replacement (which I had been thinking about doing, regardless).  So, that's what I did! It was a very simple process, actually.  I started by doing a quick google image search for the Scythe board, looking for a high resolution image of the victory track (since I know that it has a clear and moderately large image of the power icon).  I eventually found a good photo in an Ars Technica Review , which is cropped here. Next, I opened up Inkscape , which has been my favorite art program for years (although Blender might be surpassing it...) and imported that image.  Then, I drew a Bezier curve over half of it (my intent was to mirror it when I imported it into Blender, which gave me this result. I wasn't super happy with the result ...

New Thing: Gloomhaven Night Demon

Image
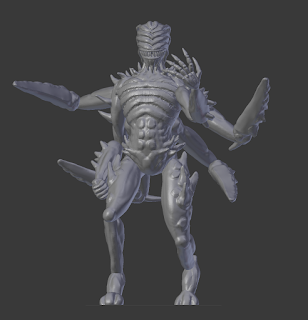
I really enjoyed the sculpting work that I did on the  Flame Demon , so I decided to dive in even deeper with some more of Zacharias Reinhardt's techniques and try my hand at the Night Demon .  In this case, I specifically wanted to use his Improved Asymmetrical Sculpting technique .  As I watched that video, I was immediately reminded of the process that I used to make the Living Bones model , where each part of the model was its own object and so could be individually posed.  I found that model of posing very intuitive (and forgiving of mistakes or late-game idea changes!), so was eager to try it out! Just as he does in his videos, I started with a cube that has a Subdivision Surface  modifier on it to make it roundish.  I then extruded faces to make the very general shape, doing a very rough version of the extrusion-shaping that Miguel Zavala  has perfected.  Since I knew that I would be doing sculpting work, I didn't worry about adding in d...

I Painted My Scythe Buildings

I've been playing Scythe recently, so I finally got around to printing and painting my full set of buildings!  If you're curious about how they came out, I posted some pictures on my Scythe Upgrades page , so check it out!