Posts

PrusaConnect Job Stuck in Queue

Well, it's certainly been a while since I've posted anything here!  I just got a Prusa MK4s, which means that I've joined the modern era of being able to send my print jobs over the network to my printer instead of schlepping them around on an SD card. I ended up stopping a print job that was going south due to insufficient supports, changed my parameters a bit, re-sliced it, sent it to the printer... and nothing happened.  The printer just sat there doing nothing.  When I hopped over to the Print Queue tab, I could see my print job sitting there, but it had red text below it (I wish that I'd thought to take a screenshot!) saying that the file hadn't been uploaded to my printer.  Playing around on the Control tab showed me that my connection to the printer was solid, but I couldn't figure out how to make it download this new file! The answer ended up being on the Printer Files tab.  My failed print job and my new print job had the same file name, and I'm ...
Making Weapon Handles in Blender

Image
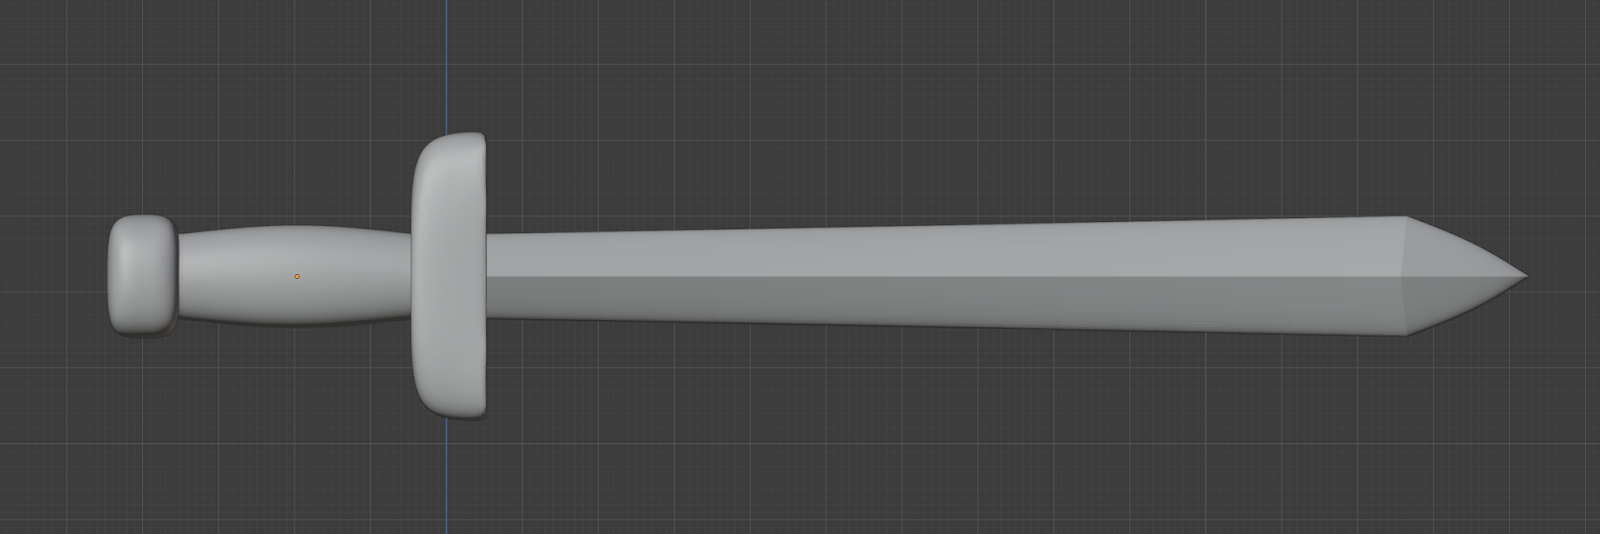
 Hey folks!  I often find myself needing to make weapons of various description for my models.  When those weapons are held in the model's hands, the grips don't usually need much detail... but if they're still sheathed, adding a quick wrap can really help them pop.  And fortunately, it's super easy to make wrapped weapon grips in Blender; here's how! First, I made myself a basic shortsword mode.  Using the Mirror  modifier on two axes makes modeling symmetrical objects like swords much easier, so I totally recommend it! After the basic sword design is done, you're going to want to make the grip a separate object to help the wrap go smoothly.  To do that, hit shift-d  to duplicate the object, then edit the duplicate (or the original... it doesn't really matter) and delete the guard, blade, and pommel.  Then, edit the other one and delete the grip.  In the end, you'll have two pieces like this (I've dragged the grip to the side, to make t...

How To Use Pre-Supported .3mf Files

Image
As I've written about a few times, I've been using PrusaSlicer's SLA tree supports for my FDM prints ... and while it's not perfect, I'm happy enough with the workflow that I haven't wanted to change it!  One of my favorite aspects of using PrusaSlicer's tree supports is that I can design them, then save the supported .3mf file, and then other people can open that file and tweak the trees.  That's really important because different printers have different capabilities, and when you size a support tree to work with a 0.25 mm nozzle, it's not always going to provide adequate support for a 0.4 mm nozzle print (and won't take advantage of the smaller interfaces you could get from a 0.15 mm nozzle!).  The .3mf format allows people to tweak those settings for themselves, while using the same basic support design! This adaptability means that I can share my pre-supported .3mf files with my patrons, and there's a reasonable chance that they'll be...

Posing Hard Bodies with Vertex Group Parents

Image
As my patrons have seen, I've been working on a proxy model for the Lurker Mindsnipper monster lately.  I had thought that I'd have a good head start on the model, with the intent of remixing my original Lurker model into this new monster... but that didn't really work out.  When I made that model, I wasn't really practicing many techniques to improve model modularity or reusability, so I pretty much remade it from the ground up.  But, that gave me a chance to learn this cool technique that I want to write about today! Vertex Group Parenting is a technique where an object is parented to a set of vertices, instead of another object.  I use object parenting extensively in my modelling process , where one object's location and rotation is locked to another object.  I most often do this for limbs, so that when I do something like moving the torso, the arms follow it.  Vertex Group Parenting does this same basic thing, except that you pick a set of 3 vertices ...

Making Veins in Blender

Image
 I've made a few monsters that have needed veiny surfaces, from plant monsters to other things .  On those models, I've pulled out the sculpting tools and have made them by hand.  While I've been generally happy with the results, that process has been both labor-intensive and inflexible (meaning that it's difficult to change things around after they've been sculpted).  I'm working on another model that needs some veiny texturing and figured out a much better way to do it... so now I'm sharing what I've done! First, I want to say that these screenshots are from the really early prototyping phase for this model, where I'm testing out techniques and trying to figure out what this thing's going to look like overall.  But, I was so happy with this vein technique, that I decided that I wanted to write about it... so here we are! I like these veins for a few reasons.  Firstly, I think that they've got a good organic aesthetic, particularly at the i...

Copying Parent-Relative Positions from one Object to Another in Blender

Image
Well, the title of this post sure is a mouthful... but try as I might, I just couldn't come up with a shorter way to phrase what I've been doing and am going to write about here!  I've been working on a proxy model for the Blood Imp monster from Gloomhaven: Jaws of the Lion.  There has been a terrible heat wave in California though with rolling brown-outs in my area due to the increased draw on the electric grid caused by everyone's AC units.  Given that we've all been suffering from power shortages, it just doesn't seem responsible to fire up the printer and put more stress on the system.  Also, because this model is only a head and 4 limbs and reposing it isn't as much work as it would be for a normal humanoid creation, I figured that I could make a few alternative poses for it while I wait out this heat wave to begin test printing! So, I made my first pose, copied it off to a new collection, then began work on another pose.  It wasn't until I'd do...

Manipulating Modifiers on Many Meshes

I like to work with many distinct meshes when I'm making a model in Blender.  Because of this workflow, I often find myself needing to add the Decimate modifier to tons of objects at once.  You can use the shift-r  shortcut to redo whatever your most recent action was, which is convenient if you're trying to put the same modifier on a few objects... but if you need to put it on 20 objects and need to set a value for each one, it gets a bit old.  Fortunately, there's a better way! All you need to do is set up your modifier stack on one of the objects, then select them all via shift-click .  Click once more on the object that's fully modified, then hit ctrl-l  and under Make Links select Modifiers .  This will copy all of those modifiers, fully configured, onto every selected object!  What do you do if you want to remove (not apply, but actually remove) modifiers from all of the objects?  Just remove the modifiers from one of them and use the ...

I Love Resin Prints, not Resin Printing

Image
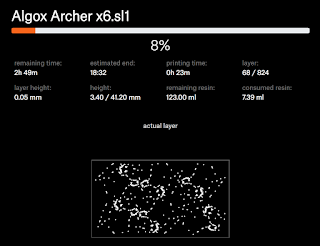
I just started a batch of six  Algox Archers on my Prusa SL1 and came to a bit of a realization: I love my resin prints, but I really dislike running the resin printer.  This isn't a complaint about the machine, as it's really incredible, but I just really prefer using my MK3 and wanted to write out my feelings on SLA vs. FDM printing. The biggest driver for me is the consumables on the printer itself.  The major consumables on my FDM printer are the nozzles and the printer bed.  Because my printer has a magnetic printing bed, replacing it is trivial, so no worries there.  Also, since I just print in PLA and never scrape the bed with any tools (I just flex it to release my prints), it's still in great shape and shows no sign of needing replacement.  I have replaced my nozzle several times, and while it's a bit dangerous to work with ~250 degree bits of metal, I have yet to burn myself and the overall process isn't that difficult.  Also, nozzles are ...

Support Head Diameter in PrusaSlicer

Image
Hi everyone, this is going to be a short and quick post.  As you've seen, I've been playing around with support trees in .3mf files.  Specifically, I've been using them as a solution to design a set of supports that will work for anything from SLA printers to FDM printers with a .4 mm nozzle, and I feel like I've made a lot of progress! I learned something new this morning though, which is important to be aware of when changing from FDM to SLA settings (or the other way).  While most details of the support tree settings (diameter, angle, etc.) are respected when you regenerate trees, the actual Support Head Diameter setting is not.  This setting is not changed because PrusaSlicer stores that value per support head, which gives you a ton of ability to fine-tune supports by shrinking or growing individual heads as needed... but it does make it a little more difficult to take a .3MF file that was designed with FDM support trees and change it over to work with SLA supp...

Tweaking Support Pads for FDM Printing

Image
When running an SLA print, the standard practice is to use a Pad, which is basically a few solid layers of very well cured resin, then have the model suspended above it on trees.  This solid pad helps ensure bed adhesion, and probably does some other important functions that I haven't even considered... but we don't necessarily need it if we're doing an FDM print.  In fact, if our model has a flat bottom, it can be really nice to have it directly on the print bed instead of floating above it! Fortunately, we can tweak the support pad in order to behave in exactly this way!  The first thing that you'll want to do is open PrusaSlicer (with an SLA printer selected), then go to Print Settings  tab and open the Pad  section.  Start out by enabling the Pad Around Object  option.  That will enable the basic "halo pad" but we're going to want to tweak a few of these other settings for our FDM printers.  The first one is the Pad Wall Thickness ....

Tweaking PrusaSlicer Support Tree Settings

Image
I've continued to play around with PrusaSlicer's support tree generation (for both MSLA and FDM prints ), and I'm starting to develop opinions about some of the settings.  So, I figured that I'd take a moment to write about the settings that I use to create trees that I like!  First, here's a screenshot of the trees that get generated with the default settings (after setting up my custom support points).  These are very robust trees, which is great for printing but less great for support removal.  When removing tree supports, I've found those diagonal bracings to be especially burdensome, as they make it much more difficult to "cut in to" the model to release the supports from it.  Fortunately, we can fix that by tweaking some settings, but you're going to need to go into Expert Mode  to get to them all.  So, in PrusaSlicer, go to Configuration -> Mode  and select Expert  to get them to show up. Firstly, we can tweak the Max pillar linki...

Using PrusaSlicer to Design Tree Supports for FDM Prints

Image
I've done a lot of work with tree supports in Meshmixer .  I don't want to denigrate the awesome utility that Meshmixer brings to the table, but it also hasn't been updated in two years.  Meanwhile, Prusa forked their version of Slic3r into PrusaSlicer and has added a bunch of support for MSLA printing... including tree supports!  And, they obviously paid a lot of attention to how tree supports are designed in tools like Meshmixer, because the PrusaSlicer interface neatly bypasses just about all of the pain points that I have when working with MM!  The one drawback is that the Tree Supports are only officially available for MSLA printers... but there's an easy way around that! In order to use PrusaSlicer to generate support trees, you need to change to one of their supported MSLA printers.  At that point, when you slice your model, it will automatically generate support trees that are tuned for that MSLA printer.  These automatically placed trees are a r...

Building Buildings

Image
I've been working on my King of Tokyo proxy models for a while now, which has meant that I've needed a bunch of buildings to put onto the bases for the various Kaiju to rampage through.  Rather than building each of these buildings by hand, I put together a system of arrays to do it for me.  Since I'm rather proud of how it all comes together, I figure that I should go ahead and write about it here! So, let's talk about how it all works.  First, here's the meat of the "city building" collection that I use (for those of you on the Patreon, that's the actual name of the collection where I keep all of this stuff in my King of Tokyo files, if you want to look at it in Blender).  As you can see, there are several partial buildings there, as well as some random bits on the right.  It's a bit harder to see, but directly in front of the left-most building, there are three bezier curves (although each is a straight line), running parallel to the world axe...